Bafang Home Conversion eBike
A run through of my experience with a Bafang crank drive conversion kit. Mixed experience along the way, from confusing to being impressed with some attributes and disappointed with others.
Firstly, there’s picking a drive motor, head unit and battery – none of which seem particularly well explained in any of the eBay or Amazon listings, so quite a bit of research is required if you’re (like I was) coming from extremely little experience or confidence with home conversion kits – it’s probably the reason you’re reading this. Even after reading various forums about the various Bafang systems, the fog, for me at least didn’t entire clear, so I decided to get advice and purchase from a UK supplier, with actual stock, even knowing that I was probably paying somewhat for that security. To be honest, if you’re in the same boat, I’d advise doing the same.
In my case, I went to Francis at Electron Cycles. Francis was helpful over the phone and explained things clearly enough for me to be able to make an informed purchase – although it was still a stab in the dark to some degree. So I went with the Bafang BBSHD with Francis’ recommended associated battery (a 52v, 19.5Ah usint that has a theoretical capacity of about 1Kw/h) head unit and bits’n’bobs. It came with a 52v battery, 46 tooth chainring and some kind of colour screen head unit. I think I paid £999 for everything including postage.
It all arrived in the post pretty quickly, because obviously Electron Cycles are UK based and had proper stock. It’s a heavy ol’ box though.
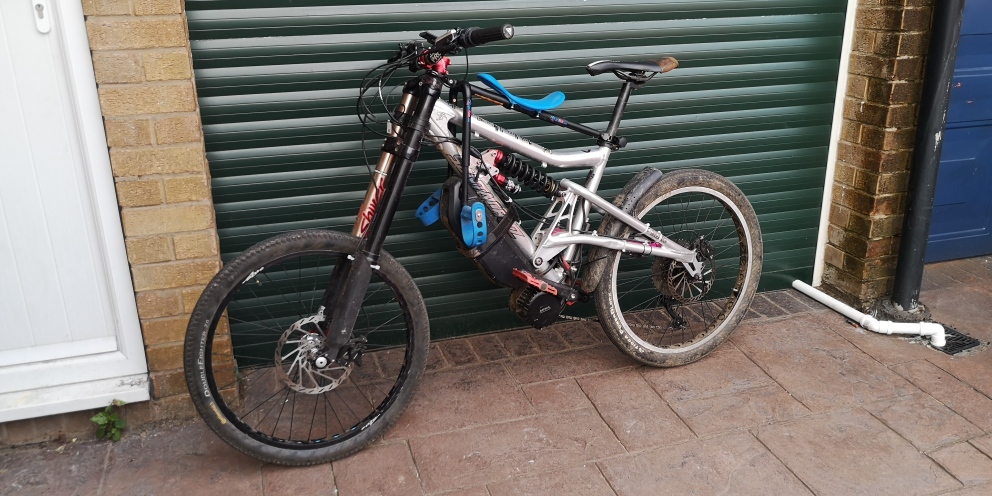
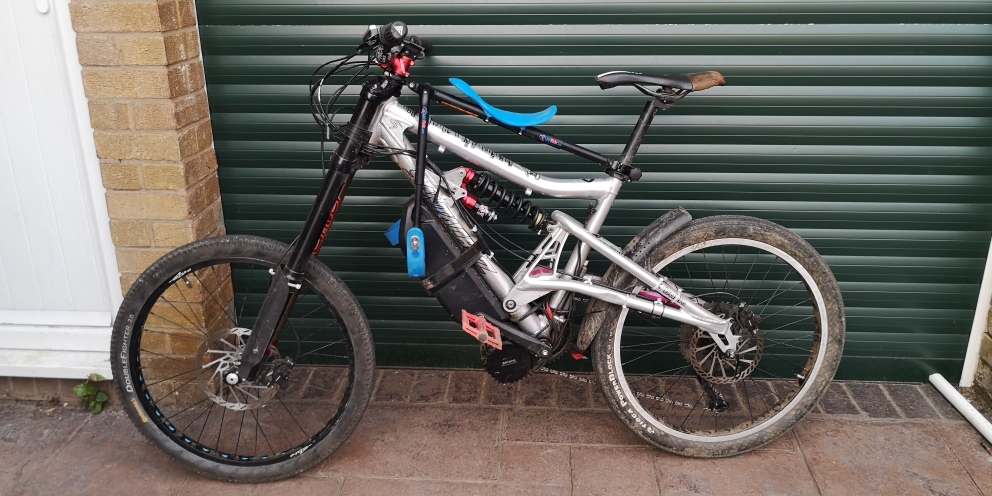
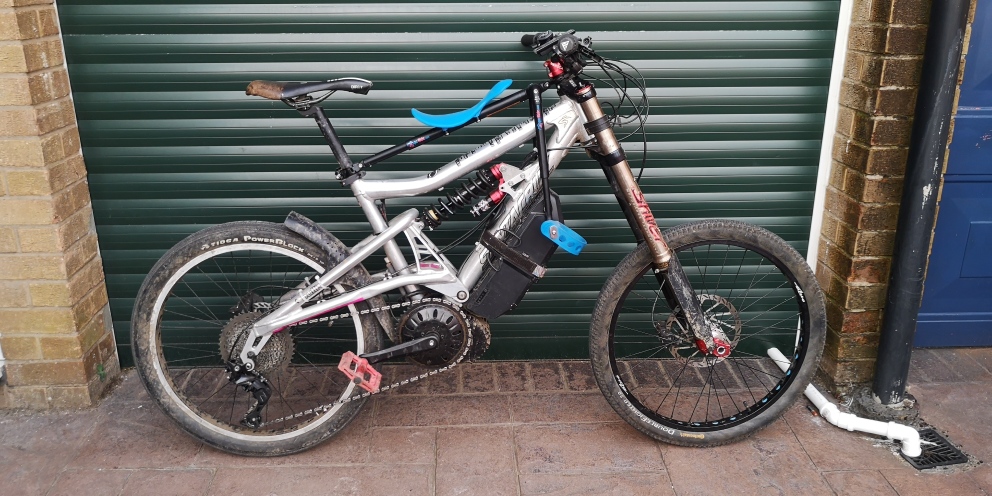
The bike – the DEATH BULLITT
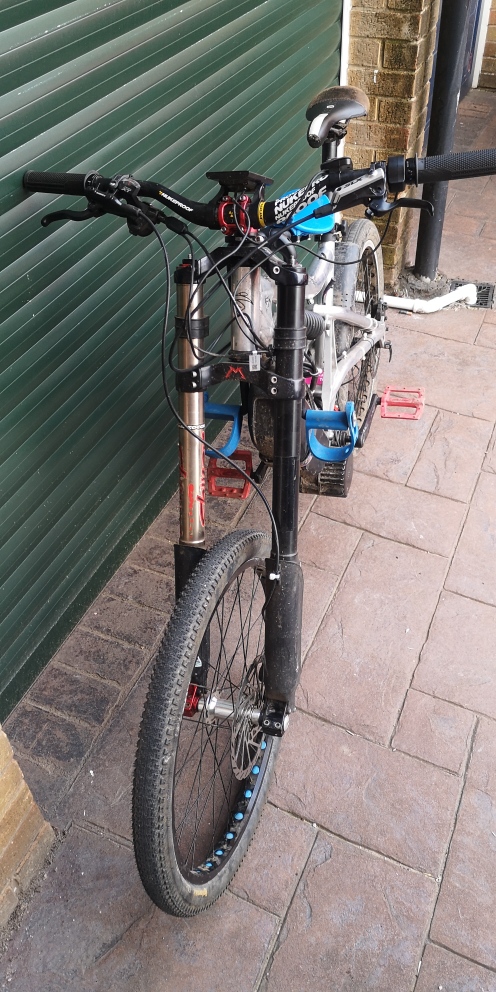
First of all I’ll just say that the bike is hilarious and intentionally meant to be both terrible and nostalgic – cos I’m daft and old enough to remember mtb’s early days. It’s also a perfect use of an otherwise useless retro bike. It’s also itself a bit of a converted mule. It’s based around my first ever DH race bike – a Mk 1.2 size medium Santa Cruz Bullitt. The not-quite-first iteration of the infamous freeride bike from 2002, this one has 178mm from-factory travel and the headtube gussets (that were very trendy at the time!) that differentiates it from the very first frame. Anyway, boring. The frame was furnished with the finest pair of 20-something year old Marzocchi Shiver DC’s with 190mm travel; and a pair of 1995-ish Hope Big Un hubs. If you’re not familiar with Big Un’s, I mean – just look at them! They’re basically adapted MX hubs – the trend at the time for freeride was heavy metal, in both a music and bike component sense. Their main feature is being big and weighing a lot. Winner.

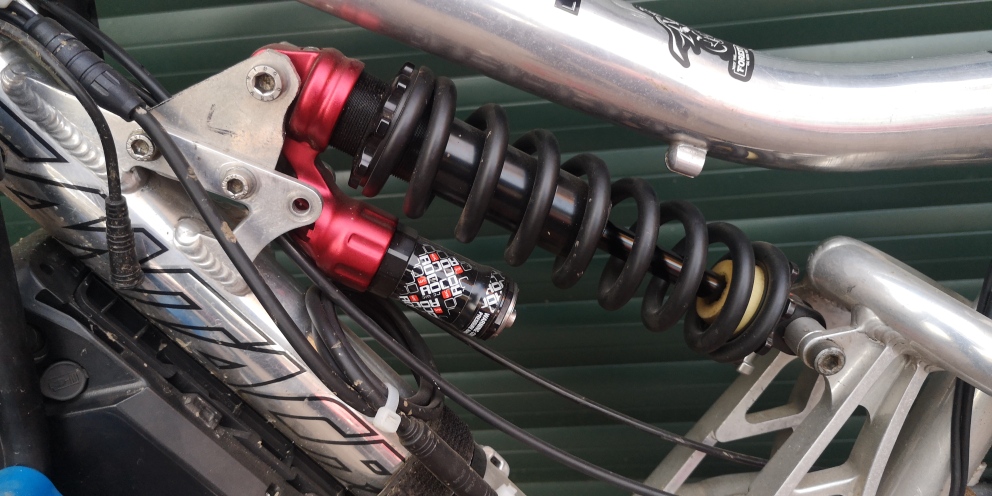
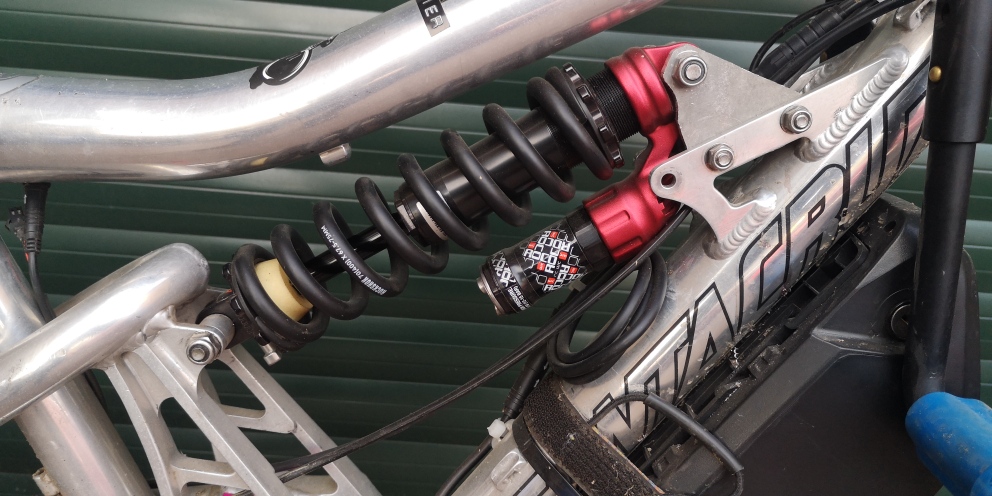
Rear shock is a roughly period-correct Marzocchi Roco WC – although a significant amount of bodging was required to shoehorn the massive 240mm shock inside the relatively tiny frame. The shock plates I made to replace the stock shock shuttle (which offers adjustment in head angle from steep to near-vertical) served not only to allow a massive shock and therefore massive travel (a rough estimate is around 250mm rear travel now), but also to reduce the frankly ridiculous head angle and bottom bracket height. I don’t know (or particularly care) about the exact maths of this part, but I think I managed to take about 60mm off the BB height and about 5 degrees off the head angle. Further reduction of BB height was achieved by fitting 24” wheels, instead of the originally spec’ed 26”. This also helped with the wheel to battery clearance – something I’ll come to later. My thinking was that this bike is mostly about being hilarious; very soft and comfy for wazzing over speed bumps at full-tilt while sat down; and as low to the ground as possible – it’s not like I plan on pedalling it a lot, the bike’s tiny size alone makes that pretty much impossible anyway (what were we thinking in 2002?!!!). That’s pretty much where the retro parts end, because not much else has survived since the early 2000’s, certainly not brakes or transmission.

The one good thing I would say about gen 1.2 Bullitts is that, unlike most of their contemporary frames, they were actually pretty tough. It’s one of very few bikes I’ve had over the last 25 years that didn’t crack after a few bad landings, so despite it being old enough to be hosting some worms at the bottom of a canal, I actually have some confidence in its structural integrity. Pivot bearings still seem fine too, which I suspect (but can’t remember) are original. Interestingly at roughly halfway through building this DEATH BULLITT, Santa Cruz decided to revive the Bullitt name and give it to their new eBike.
The top tube label stickers are a nostalgic list of stand out, fantastic memories I made with my original Bullitt all those hazy years ago. Aaanyway, on to the build…
The conversion
Bike clamped firmly in the work stand, I read the download-only installation instructions (no paper copies come with it). There are 4 main things to attach here: the battery; the motor; the cables; and the head unit & handle bar controls.
Battery
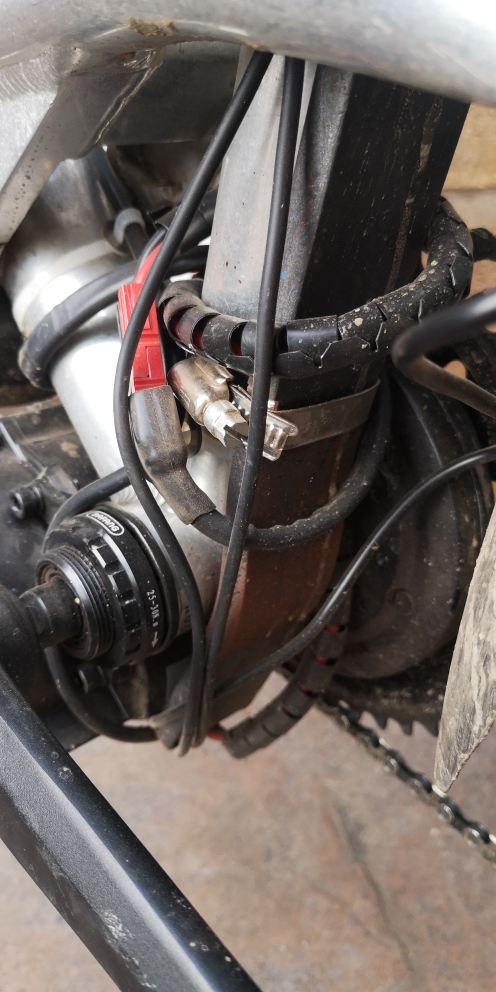
The battery mount plate comes prepared to attach to a bike’s water bottle cage mount holes, which is the first and one of the major hurdles when using a DH bike frame – which tend to either not have any, or they’re mounted on the underside of the downtube, as it true of the Bullitt. I actually ended up fitting an additional 2 riv-nuts to the underside of the downtube to make use of all 4 available bolts to mount the battery plate, plus glued in the bolts with strong Loctite. I’m also still using a Velcro strap to hold the battery on, just in case.
When you’ve done this stage, get the battery on charge so it’s ready to roll when the rest of the kit is installed.
Motor
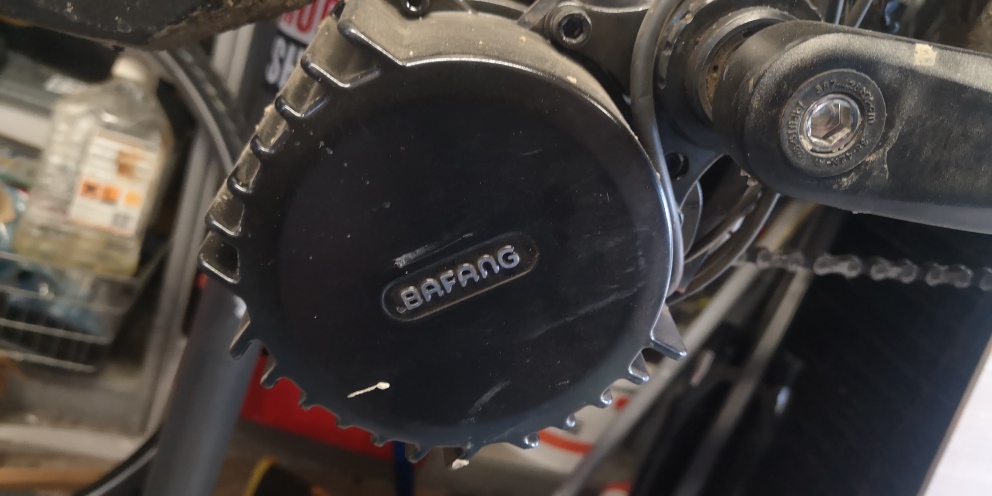
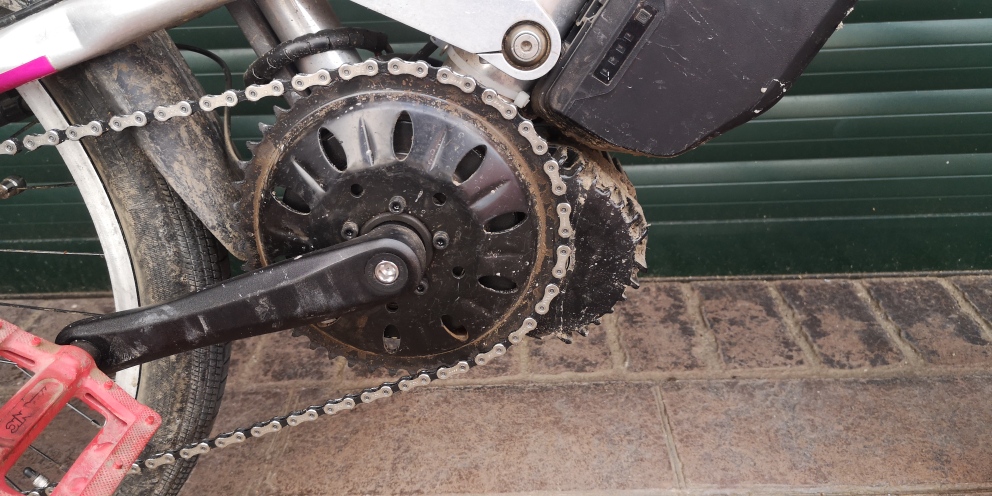
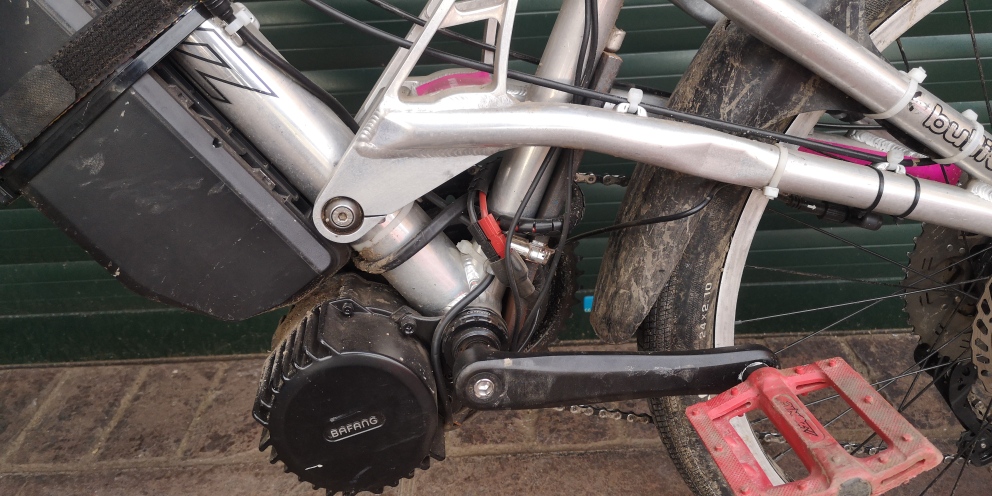
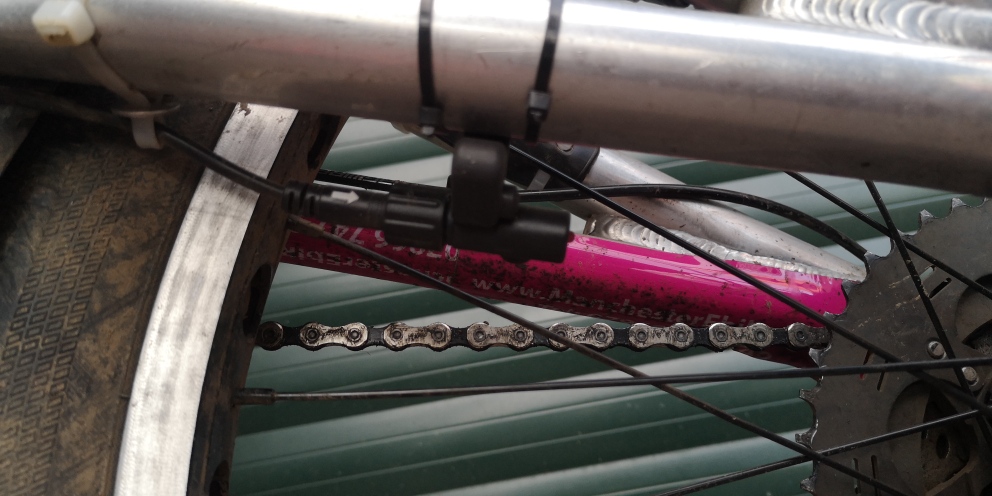
Next is the most important mount – the motor. This turned out to be a lot more simple than I expected. It’s basically a cartridge part of the motor that slides into the BB shell. It doesn’t use the frame BB threads at all, it merely sits on them. A pair of locking nuts are them applied on the non-drive side to clamp the cartridge inside the BB shell against the outer edges. At first it seems like a rather crude system, but it actually works fine. Whether it damages the frame BB threads by having a flat edge rest on the threads, I don’t know, but I don’t really care because I can’t see this bike ever having a conventional BB installed again. It’s also worth mentioning here that the Bafang specific tightening tool is required, which actually doesn’t come with any of the kits. A minor frustration, but they’re only about £15 and there are UK suppliers with stock that can be quickly dispatched. The motor resists twisting movement, and therefore transfers the twist to and only to the chainring by resting against the underside of the downtube.
I actually made and installed a crude steel L bracket, held in place with a single jubilee clip to stop the motor from ever moving from its secured position, just in case, because during my research I did come across a few people saying the BB cartridge can come loose, resulting in either creaks or worse, a moving motor. It’s probably overkill, but it wasn’t difficult to make or fit.
Head unit and handle bar controls
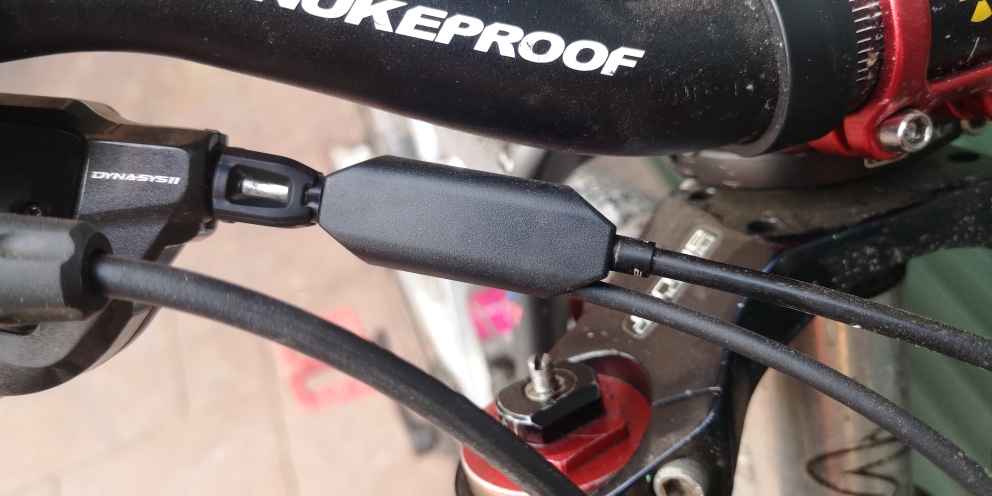
On to the head unit and handle bar controls – which are all fairly straightforward to fit. The electric cut-out brake things can go in the bin here – they only work with cable brakes and are pretty pointless in any event. Not using them also means that 2 of the electrical connectors can be capped with the dummy plugs provided.
The throttle is a rather cheap and fragile unit that looks like it would break if you look at it too strongly, but it’s functional, can be fitted to either side of the handle bar and to be fair, has actually been fine to use so far without breaking.
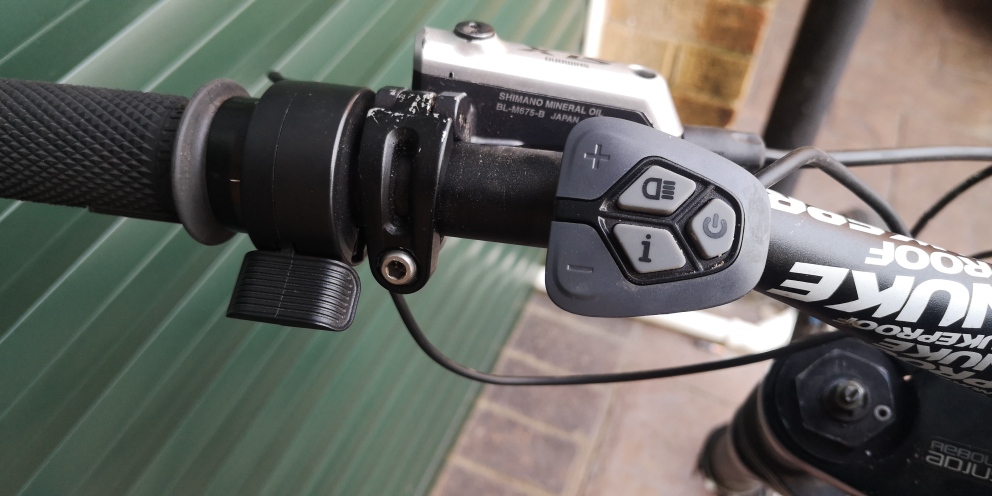
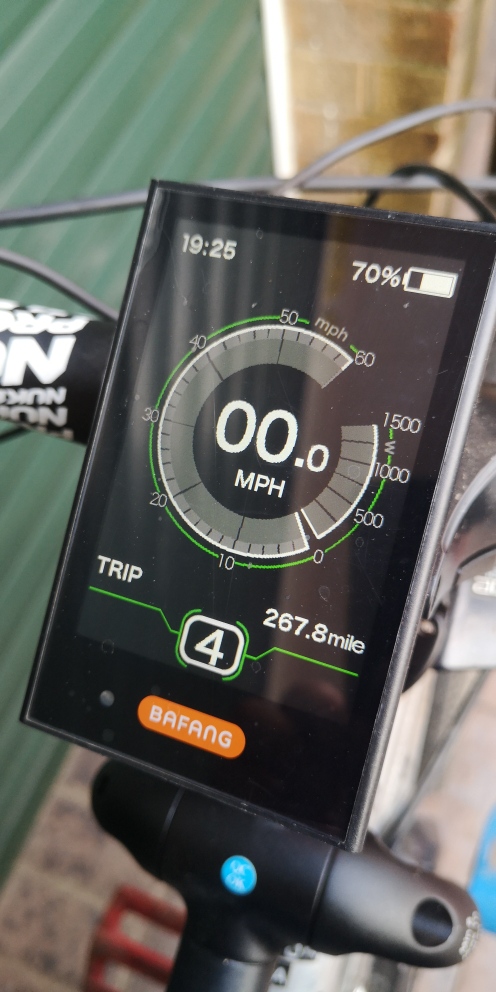
The head unit is a tiny bit fiddle to fit and will only fit 31.8mm bar clamp or smaller with adapters. Because it has a clamp either side of the stem, I found it easier to bolt up loosely during set up and only tighten once you’re ready to go test riding. It’s a colour display although the colours don’t really add to its function significantly. Quite a few superfluous modes (as per usual for eBike head units), set up menus and a somewhat underwhelming attempt at anti-theft login system, which very quickly just becomes annoying and I can’t really see it being much or any of a deterrent against theft.
Toggle switch/button assembly – straightforward again to fit, on either side of the bar as long as you have space for it.
Gear change cut out – is a 5 minute cable swap job to fit and surprisingly effective in use.
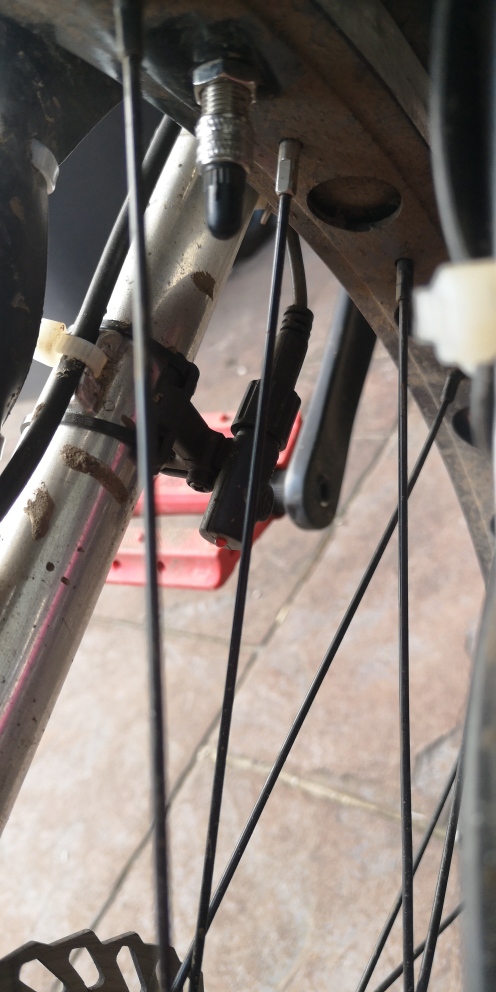
Speed sensor and wheel magnet – straightforward again, just install, align, plug in and secure into place. You just have to make the red LED on the sensor flash each time the magnet goes past.
Wiring and connections
As for connecting things up, only the wiring placement is tricky. It’s all plug and play, so when a male plug has the right physical shape and pins to fit a female socket end – it can. Most of the wires are excessively long though, obviously to fit a wide range of bike frame sizes, but they’re not easily shortened, so you have to wrap and coil cables where possible and generally hold them in place with zip-ties, although I did manage to use a few of the frame original cable fitting mounts.
And that’s pretty much it. Bolt it all on, connect it all up and you’re rolling!
Initial review
If you’re as impatient as me, you’re first test ride is probably going to be when the bike isn’t quite 100% there! So to start with, the cables and handle bar controls were all over the place, plus I didn’t initially bother with the gear change cut out gismo. And before I tidied the cables up it looked a right mess! Even with some later tidying with zip-ties, it remains a bit of a crow’s nest of cables. Anyway…. So the first thing you’re going to do (obviously), is whack it upto max power (9) and let her rip! Which it does and without pedalling at all.
Most of the potential 160Nm of torque seems to be available from pretty much zero – as is the norm with electric motors – but as is also the norm with leccy motors, is that low rev torque soon gives way to underwhelming high rev power. In simple terms, it’ll whizz you upto 20mph really quite aggressively in max power, but beyond that it really only creeps up the speedo. Achieving 30mph on the flat is easily possible if you have enough runway to get there, but really its best to aid the system with some old fashioned pedalling input.
Realistic flat road cruising speed is around 28mph. Things do get a bit more juicy on a descent though, where there is no cap to the top speed like conventional eBikes. When descending, a top speed in excess of 45mph is fairly easy to reach – so I strongly recommend a proper motorcycle helmet.
As mentioned, the power delivery settings are from 1 (default start up setting) to 9. It’s a lot to toggle through sometimes and arguably too many. I think a simpler “high, medium, low, none” would be enough, but it’s not a major distraction. If you don’t plan on pedalling much, its only really 9 that will get used, especially in hills.
The throttle controller is intended to be operated by the thumb, but it isn’t fantastically shaped ergonomically. Some of the shape compromise is probably due to its ambidextrous intended use. The obvious initial placement is on the right side – like a motorbike, but that’s where your gear shifter is, so there’s actually more free handle bar real-estate on the left side and it’s surprising how quickly you can get used to it being on this side. In theory its meant to apply power through with a gentle analogue manor, but because it has quite a short throw, it’s very sensitive. So much so, that often it only really serves as a digital button that is more easily tempered by simply pulsing the throttle lever. Again though, it’s not a big deal, just something to be aware of.
Longer term thoughts
So far I’ve still mainly really ridden the Death Bullitt on roads, with only minor flutters offroad and some green lane riding. And for that, it’s great – that’s what I made it for. It’s really quite a simple system, both in operation and nuance. Compared to a Bosch or Shimano crank driven eBike it’s what I’d describe as “agricultural”, but it gets the job done. One area it definitely exceeds other brands is the motor noise – it really is the quietest eBike system I’ve used, even quieter than the average hub motor – plus obiously the lack of restrictions in terms of power delivery and top speed.
The bike I used to make it, along with the laughably bad geometry and suspension is hilarious. It very quickly reminds you that 25 year old bikes and suspension gave no consideration to rider fit or ride characteristics. Back then, bike companies were more interested in marketing bigger travel, shiny components and the crazy “freeride” lifestyle. If you try riding it off road, the main fun is simply trying to stop it from catapulting you over the bars. The suspension has no real damping and is overly soft – perfect for simply hitting speed bumps and going up curbs.
It is definitely fun though and can be seriously practical if, like me, you live about 2 miles from the nearest convenience shop. Fit mudguards though, because fast cruising over wet roads makes a lot of spray. I’ve also had a lot of problems with punctures, but that’s largely due to using 24” wheels, because you simply can’t get tyres in that size with adequate sidewall protection for road riding.
I’d say that only major disappointment for me has been the battery capacity. I don’t think the battery capacity figures are telling fibs or that the motor is particularly inefficient, it’s just that regularly deploying 160Nm, climbing up steep hills and cruising at 25mph everywhere, generally without pedalling, takes a LOT more power capacity than I expected – coming from a background of pedal assist only eBikes.
In summary, what it lacks in nuance and sophistication, it mostly makes up for in being affordable and having loads of easily available torque. It can easily be made to fit just about any standard bike as long as you’re prepared to get creative with battery placement on suspension bikes.